The WooCommerce maintenance mode is not just a placeholder; it’s a signpost that tells your customers, about what to expect.
I once forgot to set up a maintenance mode page; what a comedy of errors – it was a flurry of confused emails and a hastily written We’ll be right back message.
Now, I’m here to save you from that chaos. Let’s see how to set up a WooCommerce maintenance mode page, and trust me, it’s easier than convincing a toddler that bedtime is actually fun.
Let the journey of enabling, activating, and mastering the art of maintenance mode on your WooCommerce site begin.
Understanding WooCommerce Maintenance Mode

Understanding WooCommerce Maintenance Mode is crucial for managing your online store effectively. At its core, when you enable maintenance mode on your WordPress site it signals a change that has been made to your WordPress site.
When activated, visitors are presented with a maintenance mode page rather than your usual WooCommerce shop page. This is particularly useful when you’re updating your store, but you don’t want these changes to be visible or interrupt the shopping experience.
The importance of enabling maintenance mode can’t be overstated. It serves as a courteous heads-up to your customers, keeping your store’s professional image intact while you tinker behind the scenes.
Whether you’re overhauling the design, implementing new plugins, or addressing unforeseen errors, a well-crafted WooCommerce maintenance mode page assures customers that you’re working to enhance their shopping experience.
Let’s see some of the major reasons for putting the WooCommerce site on maintenance mode:
I. Revamping Your Store’s Design
When you enable maintenance mode, it allows you to work on design changes without exposing half-baked layouts to your visitors. This process ensures that when your revamped site goes live, it does so with maximum impact, presenting a fresh and polished look all at once.
II. Adding New Plugins or Updating Existing Ones
Plugins enhance the functionality of your WooCommerce site. However, adding or updating plugins can sometimes lead to temporary incompatibilities or display issues.
Activating maintenance mode during this process ensures that these changes don’t disrupt the user experience. Plus, it provides you the peace of mind to test and tweak plugin settings without time pressure.
III. Addressing Errors and Bugs
No site is immune to the occasional glitch. When you encounter an error that affects the user experience, enabling maintenance mode allows you to conduct repairs without visitors encountering these issues. This not only helps maintain your site’s professional image but also prevents potential frustration or confusion on the part of your customers.
Each of these scenarios underscores the importance of a well-managed maintenance mode for WooCommerce. It’s not just about making changes; it’s about preserving user experience and trust while you enhance and improve your WooCommerce store.
Choosing the Right Plugin for Maintenance Mode
Choosing the right plugin for maintenance mode on your WooCommerce store is like selecting the perfect assistant for a crucial project. It’s about finding that balance between functionality, ease of use, and reliability.
Two popular contenders in the realm of WordPress maintenance mode plugins are SeedProd and LightStart. Each brings its unique set of features to the table, tailored to different needs and preferences.
– SeedProd Plugin:

SeedProd is renowned for its user-friendly interface and a rich selection of pre-built templates. It makes enabling maintenance mode a breeze, especially for those who are not tech-savvy.
Its drag-and-drop page builder is a standout feature, allowing you to customize your WooCommerce maintenance mode page with ease.
SeedProd isn’t just about flipping the Under Construction sign on your WooCommerce shop page; it’s about crafting a page that keeps your visitors engaged and informed.
– LightStart Plugin:
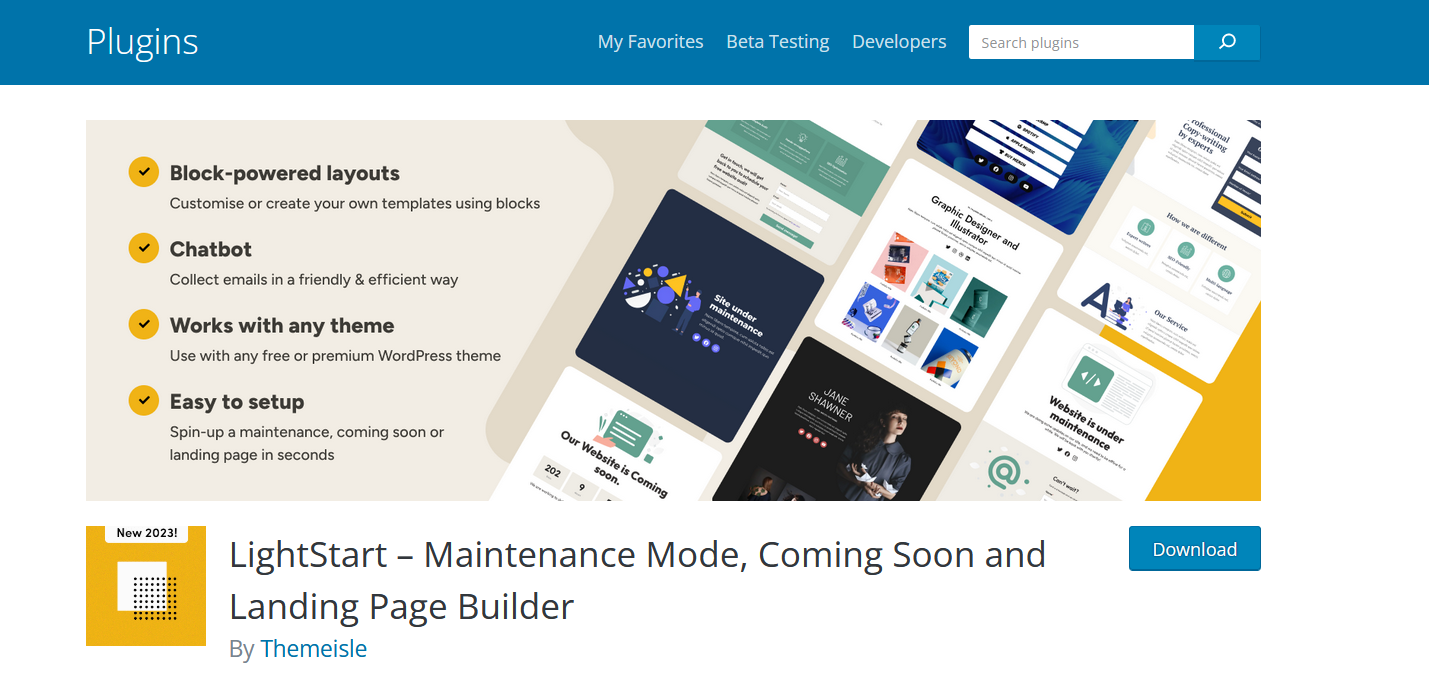
On the other hand, LightStart shines with its simplicity and straightforward approach. If your requirements are basic and you prefer a no-frills plugin that gets the job done, LightStart could be your go-to. It’s perfect for smaller WooCommerce stores or those just starting out who might not need the extensive features of more advanced plugins.
Choosing the right plugin often comes down to the specific maintenance tasks at hand and the level of customization you desire.
For instance, when I revamped my WooCommerce shop, I leaned towards SeedProd for its robust design options, which allowed me to maintain my brand’s look and feel even during downtime. However, for smaller projects, I found LightStart’s simplicity more appealing.
In conclusion, whether it’s the comprehensive feature set of SeedProd or the streamlined efficiency of LightStart, the key is to align the plugin’s capabilities with the specific needs and goals of your WooCommerce store.
Remember, the right plugin not only helps you activate maintenance mode smoothly but also enhances the experience for your customers during these crucial updates.
How to Set Up Your Maintenance Mode Page With a Plugin

Setting up your maintenance mode page is like preparing a welcoming mat for visitors while your WooCommerce store is temporarily under wraps. It’s not just about turning a sign to Closed; it’s about crafting a message that says, We’re working hard to make things better for you!
Let’s see step-by-step guide to create a maintenance mode page that’s both informative and engaging.
Step 1: Pick a Maintenance Mode Plugin
Choose your maintenance mode plugin from the WordPress dashboard and install it. This process typically involves navigating to Plugins, selecting Add New, searching for your chosen plugin (like SeedProd or LightStart).
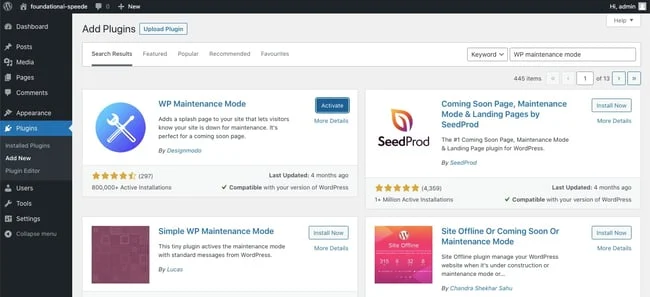
Click Install Now, followed by Activate. Once activated, you’ll find the maintenance mode option within the plugin settings.
Step 2: Design the Maintenance Mode Page
Designing the maintenance mode page is where creativity meets practicality. You can either select a pre-designed template, which is a quick and efficient way to get started or opt to build from scratch for a more personalized touch.
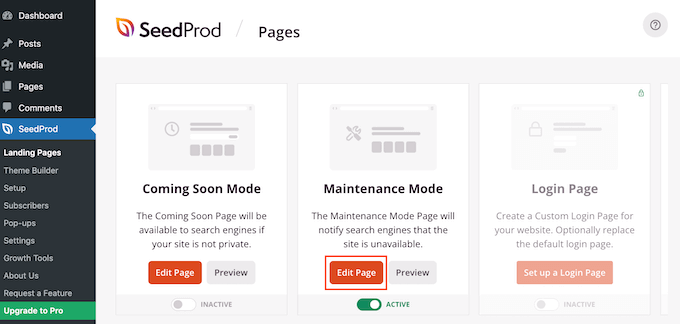
Consider adding elements like countdown timers to inform visitors when the store will be back online, contact forms for inquiries, and social profiles for keeping in touch. These features not only make the page interactive but also keep your customers connected and informed.
When crafting your maintenance page, remember that clarity and brand consistency are key. Use language that resonates with your audience and maintain your brand’s visual style. This consistency ensures that even during maintenance, your WooCommerce store’s identity remains strong and recognizable.
Setting up an effective maintenance mode page involves selecting and enabling the right plugin, designing a page that reflects your brand, and ensuring that the page communicates effectively with your visitors. This process, while simple, plays a crucial role in maintaining a positive customer experience even when your store is temporarily offline.
Configuring Maintenance Mode Settings

This is a critical step in ensuring a smooth and seamless experience for your visitors. When you enable WooCommerce maintenance mode, it’s important to tailor these settings to suit the specific needs of your WooCommerce store.
Firstly, access your maintenance mode plugin from the WordPress dashboard. This typically involves navigating to the plugin’s settings page, where you can begin customizing your maintenance mode options.
Here, you have the opportunity to include URLs for specific WooCommerce pages that you want to be covered by the maintenance mode. This might include your main shop page, product pages, or any other pages that are integral to your online store’s operations.
One thing I’ve gained is the importance of maintaining a seamless customer experience, even during maintenance. This means ensuring that the maintenance page reflects the style and tone of your store and provides clear information on when and why the site is under maintenance.
Additionally, consider providing alternative contact information or links to your social media profiles so customers can stay connected and updated.
Configuring your maintenance mode settings is all about attention to detail and a customer-centric approach. By carefully selecting which pages to include and customizing your maintenance page, you can turn a potentially disruptive process into an opportunity to reinforce your brand and customer relationships.
Going Live with Woocommerce Maintenance Mode page

This is the moment when your behind-the-scenes work is revealed in a manner that keeps your audience engaged, even in your absence.
To publish and activate your maintenance mode page, head over to the maintenance mode plugin settings in your WordPress dashboard. Look for the maintenance mode page button – this is where you’ll control the visibility of your new maintenance mode pages.
Before taking this critical step, it’s wise to test the page. Using incognito mode in your browser is an excellent way to see the maintenance mode page from a visitor’s perspective, ensuring that you remain logged in as an administrator in the regular browser window. This dual-view approach allows for real-time tweaks and adjustments.
Additionally, remember that maintenance mode pages are not just for your visitors; search engines also notice them. Ensure that your maintenance mode signals to search engines that this is a temporary state, preventing any potential impact on your SEO rankings.
To ensure everything is running smoothly, periodically check your website from different devices and browsers, and consider getting feedback from a colleague or friend. Their fresh eyes might catch something you missed, ensuring that your maintenance mode page maintains the professional image of your WooCommerce store.
Disabling Maintenance Mode
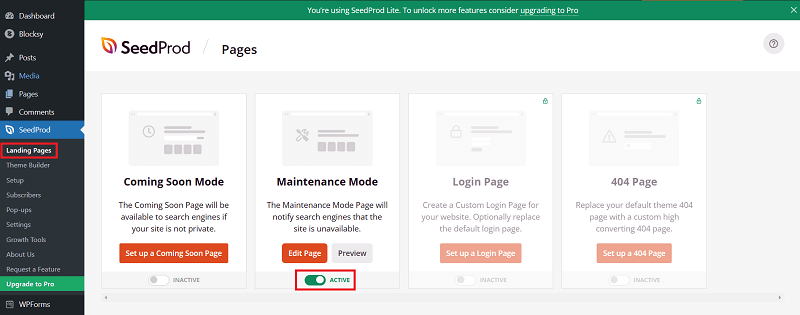
To turn off maintenance mode, you’ll need to revisit the maintenance mode plugin within your WordPress dashboard.
Here, you’ll find the option to disable or enable WooCommerce maintenance mode. This process typically involves a simple toggle or button within the plugin’s interface, shifting your site from the maintenance state back to its live, public-facing status.
When you disable maintenance mode, it’s crucial to anticipate and prepare for what comes next. A smooth transition back to normal operation involves more than just flipping a switch.
Ensure that all updates, whether they’re to the WordPress core, plugins, or your site’s content, are fully implemented and functioning as expected.
Consider the impact on your ecommerce site’s search engine rankings as well. Search engines should be able to crawl and index your site as usual, so verifying that no pages are inadvertently left in a maintenance state is vital.
Remember, the maintenance process is not just about making changes; it’s about reintegrating those changes seamlessly into your live WooCommerce environment.
To sum up, carefully managing the disabling of maintenance mode ensures that the hard work done behind the scenes translates into a positive and uninterrupted shopping experience for your customers without affecting vital elements like search engine rankings.
Conclusion

Going into WooCommerce maintenance mode? Always remember, the goal is not just to enable WooCommerce maintenance mode but to do so in a way that maintains trust and engagement with your customers.
If you’re about to embark on this path, take heart. It may seem daunting at first, but with the right tools and approach, you can navigate this process with confidence. And once you’re through, you’ll have a more robust, efficient, and appealing WooCommerce site as a result.
I encourage you to share your experiences and insights from enabling maintenance mode on your WooCommerce site. Your stories not only enrich the community but also help others learn and grow.
And if you’re hungry for more tips and tricks to enhance your WooCommerce maintenance skills, don’t hesitate to sign up for more insights. Together, let’s continue to make the world of ecommerce a more navigable and successful space for all.


